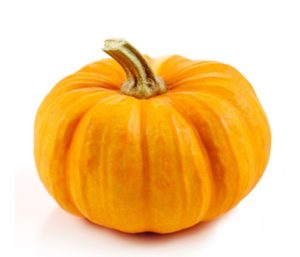
Tips for carving a pumpkin might not seem necessary – but you would be surprised how much better your pumpkin can look with these suggestions. Just remember, a jack-o-lantern is a pumpkin that has a design carved into it. Some people use pumpkin carving templates to design their pumpkins, while others decide to free-hand it and draw their own designs. There are so many pumpkin decorating ideas out there, and these pumpkin carving hacks will help you bring them to life.
First of 5 Tips for Carving a Pumpkin – Pick Carefully
Have you ever noticed that starting well is always the first step to success? Choose that pumpkin carefully!
- Look for a pumpkin with smooth, less bumpy skin. …
- Avoid pumpkins that feel heavy for their size. …
- Skip any pumpkins with soft spots, which can indicate rotting.
- Inspect the pumpkin for any nicks or cuts that may make it vulnerable to infection.
If you are not sure where to go to look for your pumpkin (beyond the Giant or Whole Foods), here is a link to some local pumpkin patches and pumpkin festivals to check out.
2nd of 5 Tips for Carving a Pumpkin – Be Careful!
According to the American Society for Surgery of the Hand, Halloween often results in serious hand injuries—requiring three to four months for rehabilitation. To help avoid a trip to the ER, take these precautions when carving pumpkins.
- Don’t rush.
- Use small, controlled motions.
- Choose a location that is well lit and a work surface that’s sturdy.
- Keep your hands and carving tools dry.
- For added safety, leave the pumpkin top on so you don’t put your hand inside the pumpkin and risk cutting it. Cut the pumpkin from the bottom and leave the top of the pumpkin intact.
- Using an ice cream scoop or large, sturdy spoon will greatly increase your seed removal speed. For lingering stringy bits, finish it off with a fork. The goal certainly is to get rid of as much gunk from inside the pumpkinas possible. If you want to use power tools to get the job really DONE, there is a link to which power tools to use and the easier your carving will be.
Never let a young child carve a pumpkin. If you allow your older child to create a jack-o’-lantern, supply them with an age-appropriate pumpkin carving tool kit and supervise them closely.
3rd of 5 Tips for Carving a Pumpkin – Keep it Simple
 To help keep younger children interested, choose an easy pumpkin carving design that won’t take long to finish. You can buy pumpkin templates and a lot of other pumpkin things on Amazon or you can download some great templates here for free. Then let your child (or your inner child) pick the best one.
Another safe pumpkin carving idea is to let your child choose a cookie cutter (or three) to gently indent onto the pumpkin. This makes an easy pattern for them to trace with a carving tool.
4th Tip – Clean Up – What to Do with those Seeds?
Pumpkin carving is fun, but it’s also messy—especially when kids are involved. Slippery pumpkin flesh or seeds may end up on the floor and cause a fall. To help minimize this risk, lay down newspaper or a disposable drop cloth under your work area, and pick it up as soon as you’re done carving.
What do you do with all those pumpkin seeds?
5th of 5 Tips for Carving a Pumpkin – Don’t Jump the Gun
I am getting ready to put my wooden pumpkins out on my front steps. I bought these pumpkins probably ten years ago from Target and I bring them out every year – and then they retire to my garage to wait another twelve months. Unfortunately, that doesn’t work with real pumpkins. So when is the best time to carve your pumpkin?
A carved pumpkin will start molding within days of breaking the skin. Here’s a way to make pumpkins last longer: Coat all cut surfaces with a bit of petroleum jelly, including the scooped-out inside if you can spare the time. The jelly seals in the pumpkin’s moisture, slowing the dehydration process that turns brilliant art into sad gunk.
If All This is Too Much
let’s just get together for a cup of pumpkin spiced latte at Starbucks and we can talk about pumpkins, the real estate market and what your dream home or next investment purchase should be. Call me at 240-401-5577 or email me at lise@lisehowe.com. Lets talk!
